
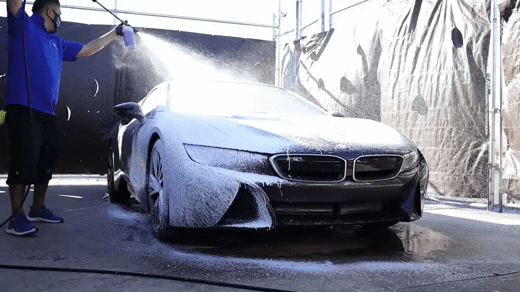
To wash a ceramic-coated car, start with the instructions for the coating actually installed, choose compatible soap and clean wash tools, then rinse, wash and dry without letting products dry on the paint. A pressure washer can help with the pre-rinse; it does not make every wash contact-free or replace careful drying.
For Santa Clarita owners planning a home wash, this guide explains which supplies to choose and how the pressure-rinse and two-bucket methods fit together. If the coating is new, confirm that washing is allowed before starting.
Before the first wash: confirm the coating is ready
Do not assume that every coating is ready for detergent washing after seven days. Ask the installer for the product name, the first permitted wash date and instructions for rain, sprinkler water or bird droppings during curing. The requirements may differ for paint, glass, wheels and film.
Our ceramic coating curing and first-wash guide covers the questions to ask. For normal maintenance, agree on a routine that accounts for how the vehicle is used and parked, rather than relying on a fixed twice-monthly schedule for every car.
Choose supplies by compatibility, not the word “ceramic”
- Wash soap: use a shampoo approved for the coating and treated surfaces. Check its dilution instructions and whether added waxes or other treatments are permitted. A pH-neutral label alone is not a complete compatibility check.
- Wash mitts and towels: use clean, soft tools suitable for automotive paint. Inspect them for grit before and during the wash. Keep wheel and lower-panel tools separate from those used on cleaner painted surfaces.
- Two buckets: one holds the correctly diluted wash solution; the other is for rinsing the mitt. A grit guard can help separate debris, but does not guarantee that a dirty mitt is safe to use.
- Hose or pressure washer: follow the equipment, vehicle and surface-care instructions. There is no single pressure setting or nozzle distance appropriate for every vehicle, especially around film edges, damaged trim or repaired paint.
- Drying equipment: use clean automotive drying towels or an appropriate vehicle dryer. Avoid dragging a contaminated towel across the finish.
- Optional maintenance products: add a booster or topper only if it is compatible and recommended for the installed coating. It is not a required final step after every wash.
Keep product names and dilution directions with your care record. This is more useful than buying a long list of accessories before you know what your coating needs.
Pressure washer method: use it to prepare the surface
A rinse or foam pre-wash can loosen and carry away some contamination before a mitt touches the paint. Do not assume that foam followed by a rinse removes all road film, or use a drying towel to scrub away dirt left behind.
- Choose suitable conditions. Work on cool panels in shade. If sunlight or heat is drying water or shampoo faster than you can manage it, stop and choose a better time or location.
- Pre-rinse. Follow the equipment and vehicle instructions, working systematically from cleaner upper areas toward dirtier lower areas. Take care around vulnerable edges and fittings.
- Apply compatible pre-wash if appropriate. Mix the product according to its label and the foam equipment instructions. Do not use a universal “one ounce per cannon” recipe.
- Control contact time. Follow the product’s dwell-time limits and keep it from drying on the vehicle. Five minutes is not a minimum for every shampoo or weather condition.
- Rinse and assess. If dirt remains, use an appropriate contact wash with clean tools rather than wiping the surface dry or increasing chemical strength without guidance.
Two-bucket method: manage dirt during contact washing
After a suitable pre-rinse, the two-bucket method separates wash solution from mitt-rinsing water. Its value depends on keeping the tools and water clean throughout the job.
- Prepare the buckets. Mix the approved shampoo at its specified dilution in one bucket and use clean rinse water in the other.
- Wash manageable sections. Use light contact and clean tools, generally moving from cleaner upper panels toward dirtier lower sections. Keep wheel tools separate.
- Rinse the mitt frequently. Check for grit before returning it to the wash solution. Replace dirty water and stop using any mitt or towel that falls on the ground until it has been properly cleaned.
- Rinse before soap dries. Adjust the size of each working area to the conditions. Do not leave the whole car covered in shampoo while other sections dry.
- Dry promptly. Remove standing water with suitable clean towels or a vehicle dryer. If a mark remains, investigate it rather than rubbing harder or reaching immediately for abrasive polish.
For a fuller maintenance sequence and troubleshooting, use our step-by-step washing guide for ceramic-coated cars.
Can you use an automatic car wash instead?
Check the installed coating’s care instructions before choosing a facility. Brush and cloth equipment touches the paint, while a touchless label tells you little about detergent compatibility, concentration or the drying process. A “ceramic” upgrade on the wash menu is not proof that the wash meets your coating’s requirements.
Use our automatic and touchless wash checklist to compare the process and ask useful questions when washing at home is difficult. We do not endorse a particular local car wash in this guide.
What should you do after washing?
Inspect the finish in good light and note any persistent marks or changes. Do not diagnose coating failure from water beading alone or apply a topper simply to conceal a concern. Share the product names, affected panels and photos with your installer when asking for advice.
For example, Ceramic Pro’s official aftercare guidance advises against washing warm surfaces, dry wiping and hard brushing, and recommends removing standing water. It also notes that contamination can affect water repellency. Follow the directions for your actual coating rather than assuming this example establishes your package’s requirements.
Plan ceramic coating and aftercare in Santa Clarita
Explore ceramic coating services in Santa Clarita or request a ceramic coating estimate. Include the vehicle, paint condition, any known existing coating and how you normally wash and park it. Those details help frame the discussion about preparation and an appropriate care routine.